
SQUEAKY CLEAN
TRAINING TIMELINE
Training Goal
Performs confidently solo/on team, efficiently, and meets Squeaky Clean Standards
DAY 1
-
Trainer explains our flow & cleaning methods per each room
-
Trainer demonstrates the task
-
Employee performs the same task
-
One room and task at a time
-
Questions / clarifications are highly encouraged at any point (even after training)
Day 2
-
Trainer re-explains our cleaning methods per each room
-
Employee performs task
-
Trainer corrects in real time
-
Trainer reinforces methods and flow
Late week 1
-
Introduces our checklist
-
Trainer continues to observe and corrects + assists employee development
WEEK 2-4
-
Trainer reinforces pacing and consistency
-
Employee is able to clean rooms solo
-
Regular check-ins by management will occur to track progress and remind of time limits
-
Employee must have trainer approve room for a final check & feedback will be given
-
Trainer steps back to observe and fill out evaluation sheets to track progress of solo readiness
-
Identify strength and coaching areas

Bathroom Flow Cleaning Methods
FOR EACH ROOM
-
Follow the checklist to know what is included
-
View connect team schedule for updates / photo references / client requests
CLEANING FLOW FOR BATHROOM
-
Clean top to bottom
-
Start at one end of the room and work your way across systemically
-
Finish one task fully before moving on
-
Avoid bouncing around (slows you down)
-
Close out the room by completing smaller tasks first (Vanity, Toilet, Shower)
METHODS FOR BATHROOM
-
Uses-Wet-Towel to Dry-Towel-Method

CLEAN WITH PURPOSE & INTENTION WITH AN END GOAL IN MIND
When we clean we are looking to rid of debris, food marks, streaks and we need to know when we have accomplished this in order to move on to the next thing.
If you have no purpose/intention while you clean and no end-goal in mind it will lead to wasting time wiping the same thing over and over again, and you will miss details because you do not have the purpose or intention as you clean.
We will teach you what to look for to get rid of as you clean, how to check your work, and what the end result should look like in order for you to move on confidently.
REVIEW WORK WITH OUR CHECKLISTS
In general cleaning is cleaning. However, each home is not the same and each client has different expectations.
You are required to clean along with the list outlined per room on Google Calendar. This is important because you may clean something that the client didn't want cleaned. The client has expectations and as long as you follow the list you will be great!
Before heading to another room, ensure you are using our paperback lists to do a final check of your work. You need to read each item off our checklist and physically look at the area and check for total cleanliness. You'd be surprised how many times you thought you cleaned perfectly and then for a final check see something that was missed!
Kitchen
Main Sprayer "Part water part dish soap" safe on all surfaces (be careful to not use it on sensitive wood furniture).


Small amount used to scrub into a dirty sink

Small amount used on stainless steel
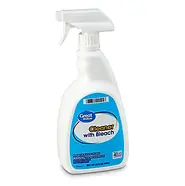
Bleach used for white kitchen sinks
CLEAN FROM TOP TO BOTTOM
START
END

Start at one end of the room & work into sections
(top to bottom)
Kitchen & Bathroom Goals
DEBRIS-free, STREAK-FREE + Organized


Dishes put in the washer, towels folded, items put back neatly.


Fruit organized in a bowl, items moved over neatly.


Check your work
You need to understand what you're looking for when checking your work
FOOD DEBRIS
Looking for:
Grime (orange/ brown color)
food debris
streaks
If items are neat and organized
Where to check:
Counter tops
Countertop items
Sink (faucet + drain)
Appliances
Counter tops, appliances, sink, coffee maker, kitchen counter top items
Looking for:
Grime (orange/ black color)
Debris
streaks
If items are neat and organized
Where to check:
Mirror
Toilet crevices
Sink / faucet
Vanity
Shower ledges + chrome
KITCHEN
BATHROOM


SINK DETAILS
Ensure sink is free from food debris, drain is grime-free, chrome is streak-free and around the faucet edge is grime-free.


APPLIANCES

Look for streak-marks at different angles


Run hands along fridge handles to ensure they are smooth to touch
Be sure to check for streak-marks around the handles.


Bathroom

Main soap sprayer
Toilet bowl cleaner
Bleach to lighten mold and orange grime
Vinegar for glass shower doors to help remove hard water stains
#3 Steps to Bathroom Cleaning
Have 2 micro towels on hand for the entire bathroom
Towel # 1 is for wiping the mess. Towel #2 is for firmly pressing with to get rid of streaks, and debris
Relplace dirty towels for new ones when needed.
1. Tidy bathroom
2. Clean (top to bottom) start at one end of the room and work your way to the other side of the room
3. Check over your work as you clean + one final check
Tidy Bathroom
Shake out the rugs (ensure they are free from debris + hair) flip them neatly over shower bar
Fold towels neatly on towel bar
Flip shower curtain over
Empty and replace trash bag
Fold toilet paper
Wipe the shower edge to line the shampoo up


MIRRORS


Lightly spray the mirror and wipe with towel #1 (removing any toothpaste spit marks)
Immediately after, switch to towel # 2 and continuously wipe up and down until mirror is dry. We want the mirror to be free from dust particles, streaks and spit marks.

TOILET


After toilet is clean scrub the toilet bowl (10 seconds max) place the brush under the toilet bowl.
SINK


The sink needs to be completely clean from any orange color, tooth paste, hair etc.


SHOWER
Determine cleanliness level of the shower. Are shampoo marks on walls? Use the sponge to loosen marks. Upper walls do not need as much attention as the shower floor does. Is there orange or mold present? It will need to be sprayed with bleach and sit for a moment before scubbing
START TOP TO BOTTOM
+ TAKE SHOE COVERS OFF IF STEPPING INTO SHOWER
Finish cleaning glass shower doors one side at a time. Use 2 micro towels per side.
USE PROPER FORM
BEND AT THE KNEES NOT WITH YOUR BACK


SAFTEY PURPOSES: NEVER MIX BLEACH WITH ANOTHER CLEANER OR IT WILL CREATE A HEAVY FUME

Living Room


TIDY UP AND THEN WIPE SURFACES
Determine which items can be moved off the floor for vacuuming.
(Small step stool, small dog bed, small laundry basket) Do not move heavy items.
PREP FOR VACUUMING STAGE


Blankets are folded, pillows placed neatly, end table items organized, couch marks made with special brush


End table items are organized, shoes/ items on floor are relocated

In this example the pillows are laid in a diamond shape and blankets are rolled!
BE CREATIVE AND HAVE FUN
Bed room

If the client has a huge amount of clutter on their dressers, then dust around the items.
FLOORS


Before vacuuming flip chairs or line the chairs along a wall. If the chairs are very heavy or there is more than 4 to a table leave them down.
2- Step Vacuuming Process

#1

Start with the "Main" vacuum piece. Vacuum at the opposite corner to the entry point of the room and clean your way out of the room.

#2

After you have gone around the entire room attach the "corner piece" and go along the edges of the home. (Skip in carpeted rooms)
Kitchens and bathrooms, hallways have the most crumbs along the edges. You will find crumbs along the kitchen table legs and behind doors, under the lower cabinets.
During the use of the small vacuum piece attachment, we are visually scanning corners and keeping a keen eye for that the main vacuum piece missed vacuuming up.


WE DO NOT VACUUM ALL THE WAY UNDER COUCHES OR BEDS ONLY PARTLY IF WE SEE CRUMBS

We want to get front door mats as clean as we can. Our main vacuum piece may not get in-between the rug grooves. Use the small attachment piece and wave it around until it looks clean from debris.


Starting at the top of the staircase use a towel to wipe the exposed wood. Then use the small couch brush to create "triangles" finally use the small attachment piece to create vacuum lines.


Carpet vacuum marks should look pretty! Find the "sweet spot" when vacuuming. Different angles can expose vacuum marks deeper and more defined.

Work in rows when vacuuming carpets. Some carpets may not show vacuum lines so in that case do not worry about working in layers.
Mopping
Libman Tornado Mop Refill Instructions - YouTubehttps://www.youtube.com/watch?v=SpcBTNBE9_g&list=PPSV

Before filling the mop bucket determine if it could use a quick rinse to get out any dirt or debris
Fill bucket with water a little past the halfway point
Spray fabuloso for 5 seconds into bucket

We use method wood cleaner on sensitive wood floors to help with streaking. Use a small amount directly on the floor and immediately mop it into floor.
ALWAYS mop in the direction of the floorboards to help prevent streaks.
USE PROPER FORM
